Introduction 👋
In the previous episode we set up the project and repository for Dispensa.
"Dispensa" is the Italian word for "Pantry" and my idea is to make an application to track what food is available in your home to make the experience of buying groceries a bit easier.
If you want to know more about the stack, I encourage you to read the previous episode.
Implementing authentication 👤
In order to authenticate users of Dispensa I chose to go with Auth0 for a couple of reasons:
- It is a very well known authentication provider that supports OAuth2
- Plays nicely with Hasura's JWT_SECRET system
- I have never used it before, so it is an opportunity to learn
To integrate Auth0 with my application I used Expo's AuthSession.
The authentication happens in two steps.
Generating an authentication request
Auth0 allows your users to authenticate through an in-app browser, and AuthSession handles all the complexity of generating a valid request and following redirects.
Note that you will need to copy your Application's client id and endpoint, you can find them in the Auth0 dashboard.

Then you can use these strings to create a request:
const useProxy = Platform.select({ web: false, default: true });
const redirectUri = makeRedirectUri({ useProxy });

const [request, , promptAsync] = useAuthRequest(
  {
    redirectUri,
    clientId: "<your client id>",
    responseType: "code",
    scopes: ["openid", "profile", "email", "offline_access"],
    extraParams: {
      audience: "<your audience>",
    },
  },
  {
    authorizationEndpoint: `<your endpoint>/authorize`,
  }
);
Converting your authentication code into JWT tokens
In the previous request we set the responseType to "code" and added a scope of "offline_access".
This is needed to make sure that the response we get from Auth0 includes a code that can be exchanged for JWT tokens, including a refresh_token.
We can fire off the request by associating a callback to a button press, and then defining the authentication function like so:
async function authenticate() {
  const response = await promptAsync({ useProxy });

  if (response.type !== "success") {
    if (response.type === "error") {
      throw new Error(response.error?.message);
    } else {
      return;
    }
  }

  const verifier = request!.codeVerifier;
  const code = response.params.code;

  const tokens = await exchangeCodeAsync(
    {
      code,
      clientId: "<your client id>",
      redirectUri,
      extraParams: {
        grant_type: "authorization_code",
        code_verifier: verifier ?? "",
      },
    },
    { tokenEndpoint: `<your endpoint>/oauth/token` }
  );
}
Make sure to pass the code_verifier from your request to the function that exchanges the code for tokens. This step was not clear from the documentation, but I found this article to be very useful.
You can find all of the code for this part on the repository for dispensa. Commit
Integrating with Hasura
Now that we can authenticate users through our app, we need to make sure that the Hasura database is aware of our users.
First of all, I followed this guide and generated my JWT secret string here and set them as an environment variable on the Hasura console.
I will tell you more about my Hasura setup in the next episode.
Adding custom claims to the token
In order to be recognized by Hasura, the JWT token generated by Auth0 must contain a special portion in the payload that certifies who the user is.
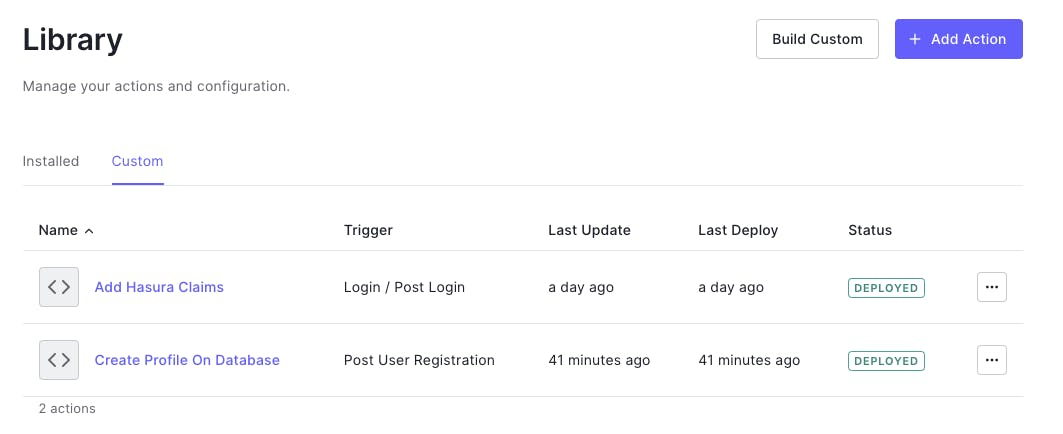
To do so, I used the newly announced Auth0 Actions feature. Actions give us access to a Node.js serverless function that can be fired after a given event, which is very useful for our app, since we don't have a secure server to run admin tasks on.

The first action fires after each login, and ensures that the payload contains the claims needed by Hasura.
/**
* Handler that will be called during the execution of a PostLogin flow.
*
* @param {Event} event - Details about the user and the context in which they are logging in.
* @param {PostLoginAPI} api - Interface whose methods can be used to change the behavior of the login.
*/
exports.onExecutePostLogin = async (event, api) => {
  const namespace = "https://hasura.io/jwt/claims"
  const user_id = event.user.user_id;

  if (event.authorization) {
    // Set claims
    api.accessToken.setCustomClaim(namespace, {
      'x-hasura-default-role': 'user',
      'x-hasura-allowed-roles': ['user'],
      'x-hasura-user-id': user_id
    });
  }
};
And the second action is only fired once per user after their successful registration, and adds them to the Hasura database using the admin secret.
const mutation = `
  mutation CreateUser($id: String!, $email: String!, $username: String!) {
    insert_users_one(object: {id: $id, email: $email, username: $username}) {
      id
    }
  }
`;

/**
 * Handler that will be called during the execution of a PostUserRegistration flow.
 *
 * @param {Event} event - Details about the context and user that has registered.
 */
exports.onExecutePostUserRegistration = async (event) => {
  const fetch = require("node-fetch");

  await fetch("<your graphql endpoint>", {
    // ...options and variables from event
    headers: {
      "X-Hasura-Admin-Secret": event.secrets.hasuraAdminSecret,
    },
  });
};
The result ✅
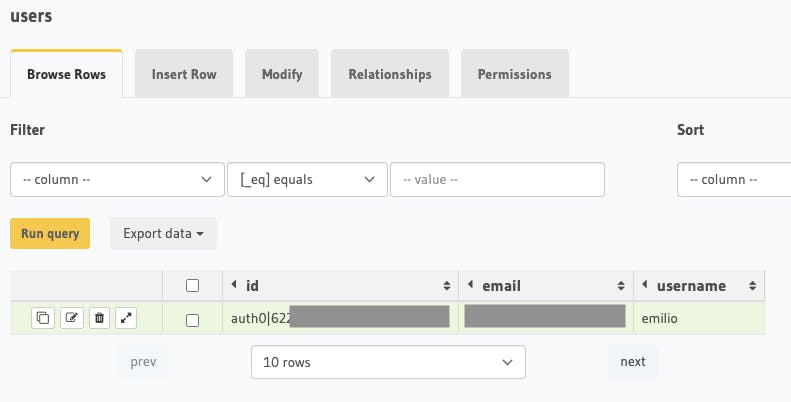
As a result, we now are able to sign up for the application, and a row for the new user in the database will be automatically created.

Next steps ⭐️
The next step will be to start defining the structure of the database and let users make the first operations through the app. See you in the next episode!
Social
As always, you can find me on Twitter and GitHub. The code for this project can be found on its GitHub repository